Welcome to another Shopify tutorial. In this blog, we are going to go a little more in depth on how to create BOGO discounts, both manual and automatic.
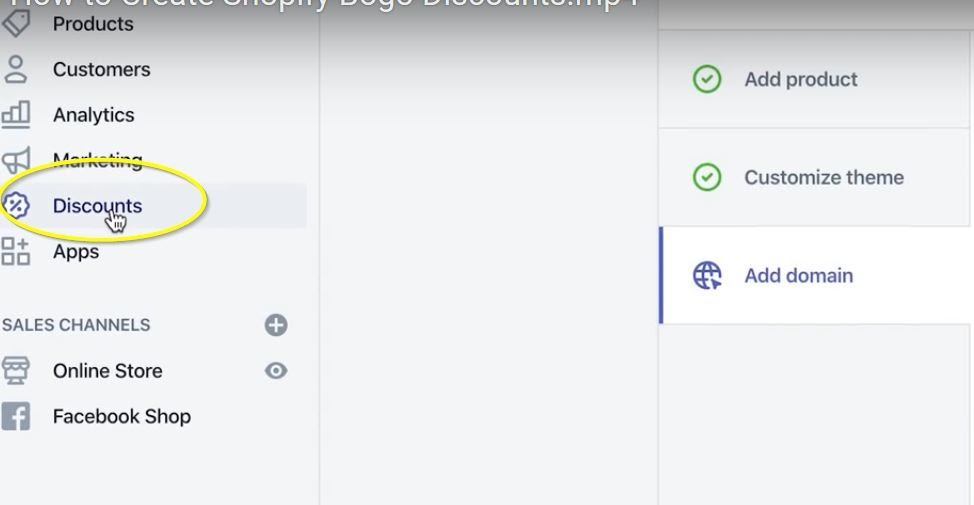
After you login to your Shopify, you’ll want to go to discounts on the left hand side.
Once you are in the discounts page, you will see that it has both discount codes and automatic discounts. This is where you will see what discounts you have set up.
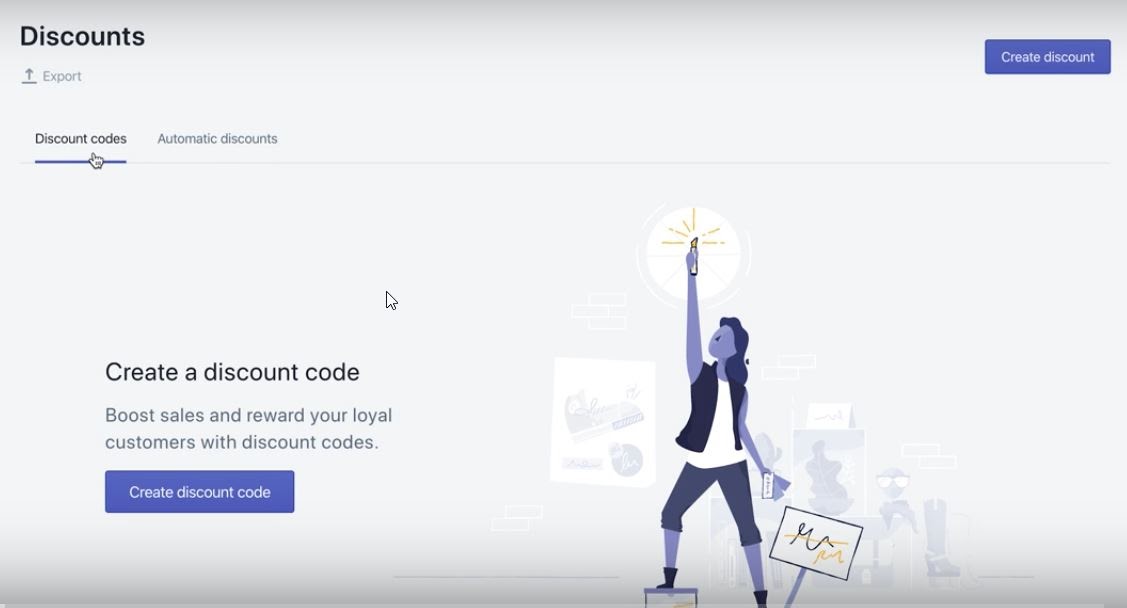
First off, you will want to click on the Create Discount button in the upper right hand corner.

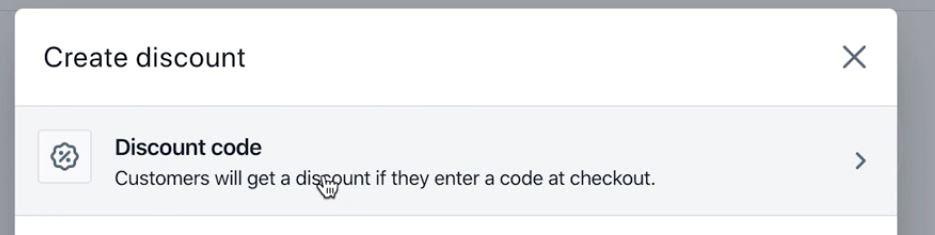
This will then prompt the question of whether you want to do a discount code or an automatic discount.

A discount code is where customers actually have to go in and put in the code. An automatic discount is one where the customer doesn’t have to put in a code, it just automatically applies the discount. First, let's create a discount code.
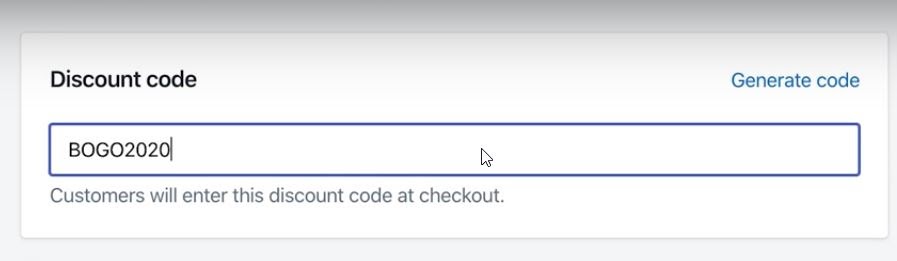
In that discount pop up, you will want to click on Discount Code. Again, this is the manual one where you create your own discount code and give it out to customers for them to input when they checkout.
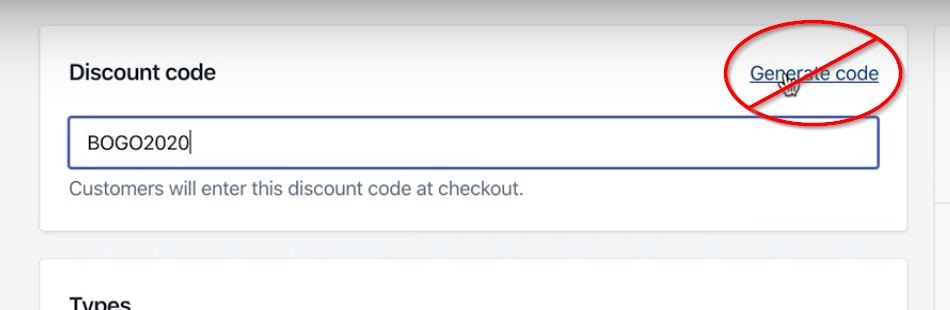
For this example, we will just use the code BOGO2020. When you create a discount code that customers have to actually type in, you want to create something that’s easy to remember. Usually, people do all caps just so there is no confusion between uppercase and lowercase and things like that.
Now, Shopify does give you the ability to generate a code, but that code is just going to be a random string of letters and numbers, so you probably don’t want to do that since that code could be difficult for customers to remember.
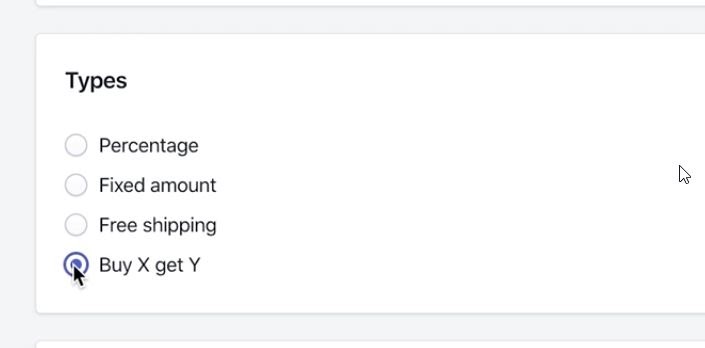
Once you’ve typed in what you want the code to be, you’ll want to scroll down to Types. Here you will determine what kind of discount you want to give. For this instance, since you are creating a BOGO, you want to make sure to click the last option, Buy X get Y.
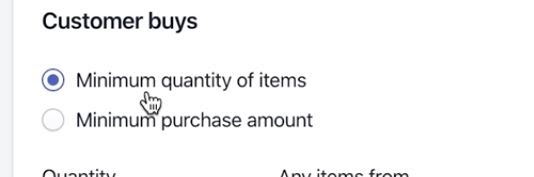
After you click that, Shopify gives you a few options when you scroll down further. One thing you can do is choose between Minimum quantity of items, which, for example, you have to buy 2 of something in order to get the discount. Maybe you’d have to buy 2 pairs of shoes to get free socks. Or you can leave it simple and have it be buy a pair of shoes and get a free pair of socks. The minimum purchase amount would be something like, once you reach $20, we send you this free koozie, for example.
For this, we’re going to leave it at minimum quantity of items. In the quantity box, we’re going to just go with 1.
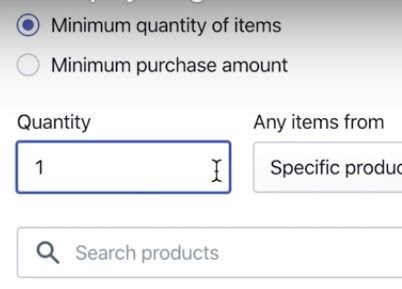
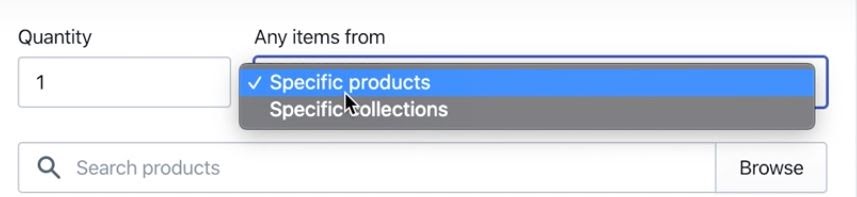
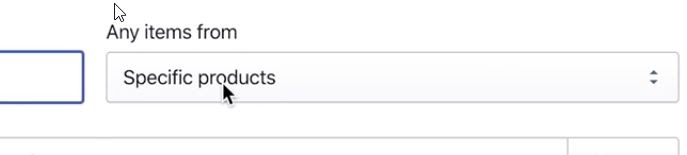
In the Any Items From section, we’re going to keep it at Specific products. You can choose whichever works best for you.
Let's say that you have a huge collection of socks and you want to leave it open to the customer to pick their style or type of sock that you want them to pick. So you would do a specific collections and then under collections, you would click on socks. Again for this, we are doing the specific products.
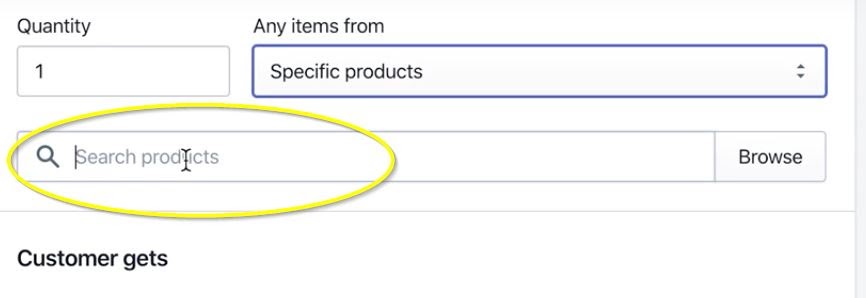
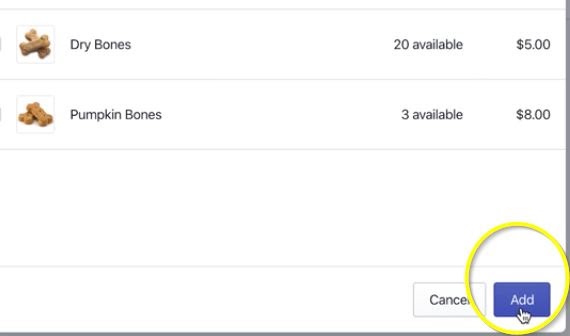
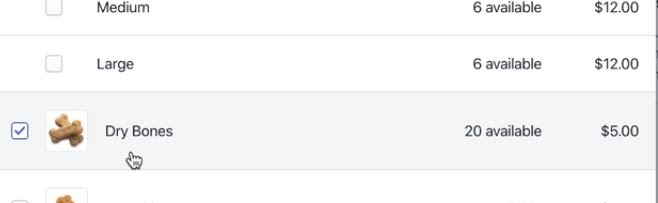
In the box below, you will search for your product. This is product X, so this is the product that the customer has to buy in order to get Y. So to choose that product, you will click in that box and it will bring up an Add products box. You will then type what product you are looking for in the search bar. For this, we are typing Bones. It will bring up all the products you have with that product you searched for. For this, we are choosing Colored Bones.
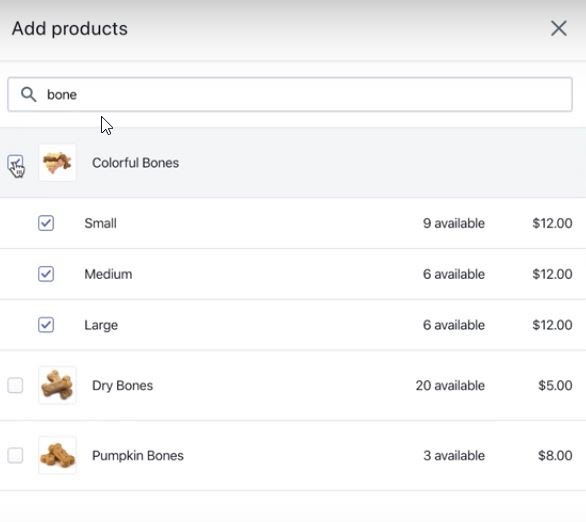
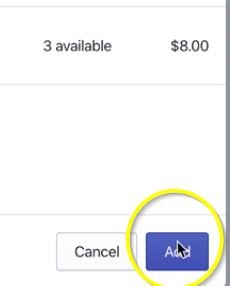
Once you select your product, click Add in the bottom right corner.
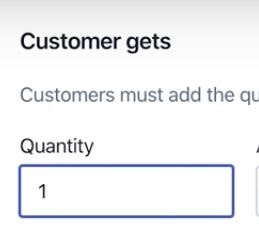
In the next section, you will see it says “Customer Gets.” This is the Y product, what the customer will get when buying product X. So in the quantity, you’ll want to put how many of the free products the customer is going to get. For this example, it will be 1.
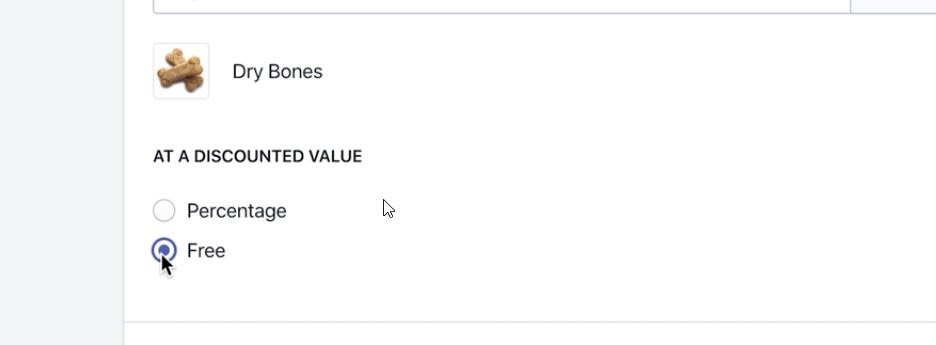
In the next box, you will again choose the specific product and find the product that the customer will be getting in the product box. Clicking in this box will again bring up that search option for you to search your products. For this, when they buy colored bones, they will get 1 free dry bone.

Again, when you’ve selected your product, click Add in the bottom right hand corner.
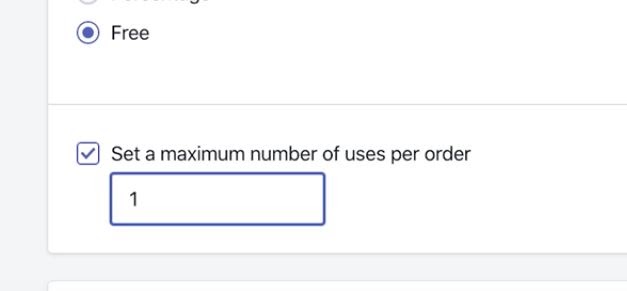
Below that you have the option, under At A Discounted Value, to choose either percentage or Free. Since this is a BOGO, you’ll want to make sure to choose Free.
After that, you will see that you have the option to select the option to set a maximum number of uses per order. We highly recommend that you check this so that customers don’t exploit the discount or use it multiple times.
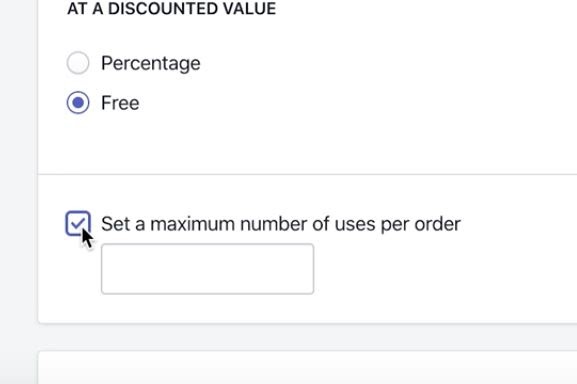
Once you check it, a box will pop up where you can type in how many times someone can use the discount per order. We are going to set it at 1.
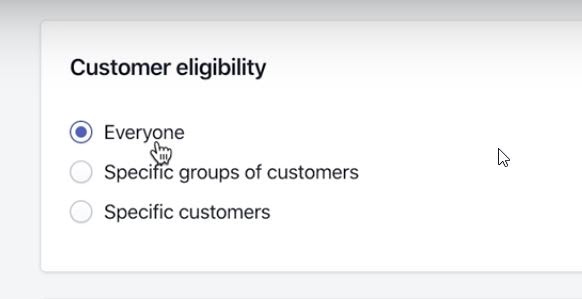
In the next section, you will see the Customer Eligibility. This allows you to be a little bit more granular with the type of customer that you want to let use the discount code, but we are just going to leave it at everyone.
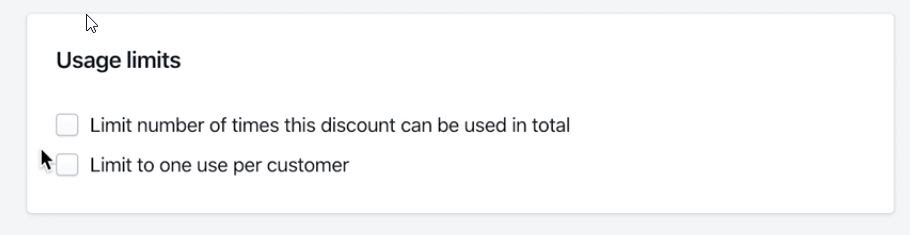
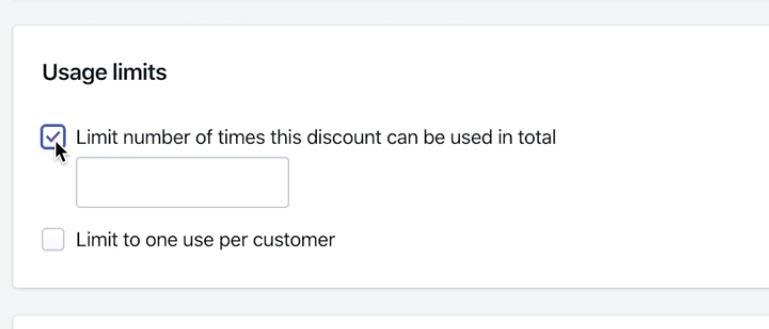
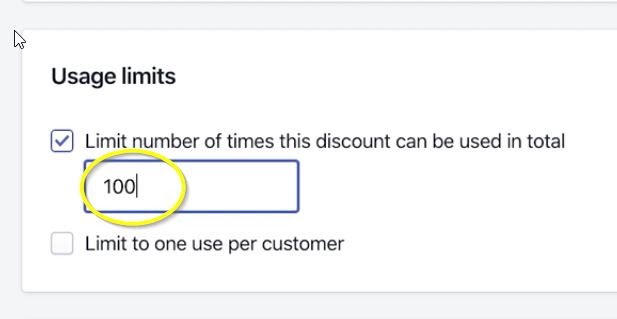
Below that is the Usage Limits. This allows you to limit it even further by letting you choose to limit one per customer or limit the number of times a discount can be used in total. For example, if you are running a special where the first 100 people who buy product X get product Y for free, you would use the Limit the Number of Times Used option. You would check that box, and then type in 100. After 100 uses, the discount code is no longer good.
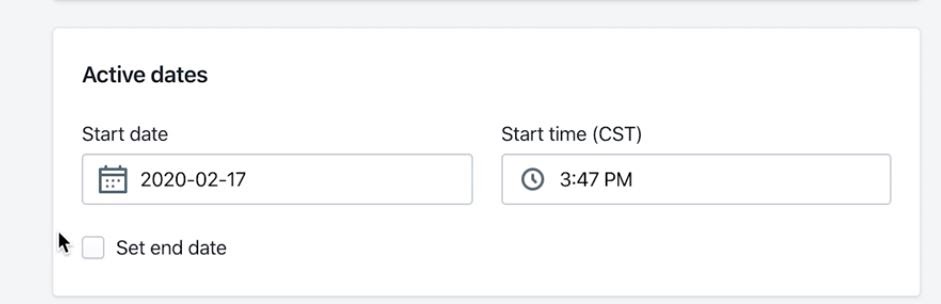
The last thing you will see is Active Dates. You can set up the active date for when the actual discount code will be active on the store, and then you can also choose an end date. This allows you to have a cut off date. This would be most useful if you are choosing the limit one per customer and you only want to run the discount/BOGO for a certain amount of time, like one month.
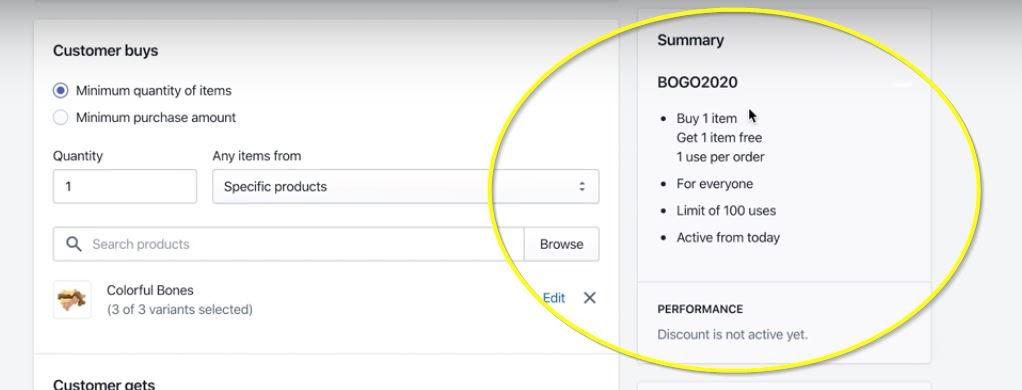
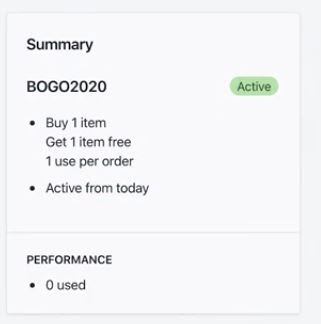
Once you have everything selected and filled out for your discount, on the right hand side, you will see a summary of your discount that you are offering.
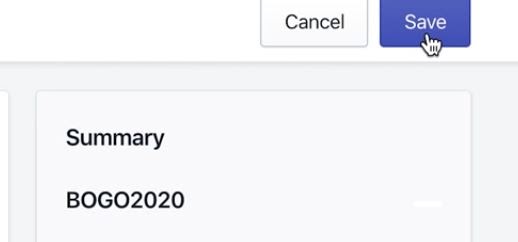
If everything looks good, you will click Save in the upper right hand corner. Your discount code is then good to go.
Now, if you don’t want your customers to have to type in a code, you can create an automatic discount code.
Again, from the discount section in your dashboard, you will click on the Create Discount button in the upper right hand corner.
That brings up your discount options menu. You will choose Automatic discount.
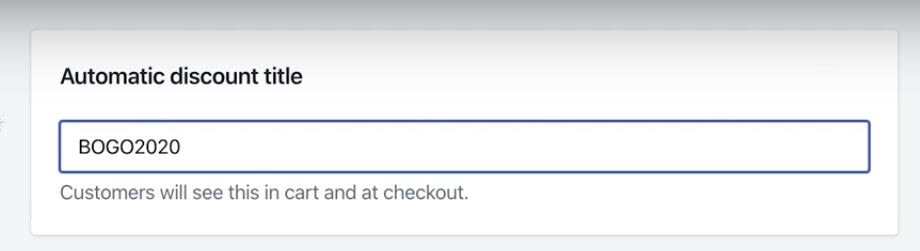
You will type in the code that you want to use. Again, we will use BOGO2020, but the customers are not going to need to type that in, Shopify will do it automatically.
After that, you will pretty much do the exact same thing as when setting up a coupon code. In Types, since this is a BOGO, choose Buy X get Y.
In Customer buys, you’ll choose Minimum quantity of items. We are again going to say 1 quantity and a specific item. We’ll then click in the Search Products box to bring up our product list. We will type in bones and choose colored bones.
Make sure to click Add at the bottom of your product page.
In the Customer gets section, it will be 1 in the quantity, specific product and search the products and choose dry bones.
Again, make sure you click on Add at the bottom of your product page.
Make sure to choose Free in the At A Discounted Value section, and check the Set a minimum number option so that people can’t over use it.
Once everything looks good, you can scroll to the top and look at the summary to make sure it looks good. If it does, you’ll click Save in the upper right hand corner.
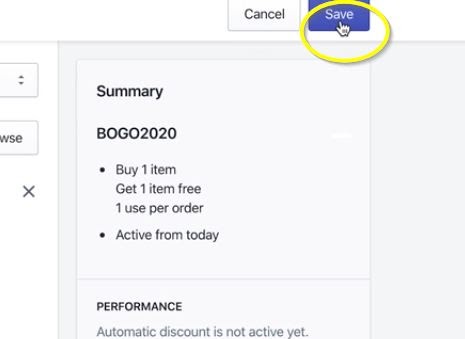
Now, be aware that Shopify only allows you to have 1 active automatic discount at a time. So if you already have something else that's an automatic discount and it’s active, Shopify won’t let you create another one. You can’t have 2 at the same time. It will give you a message saying that you can’t turn on the discount you are creating because you already have one automatic discount on.
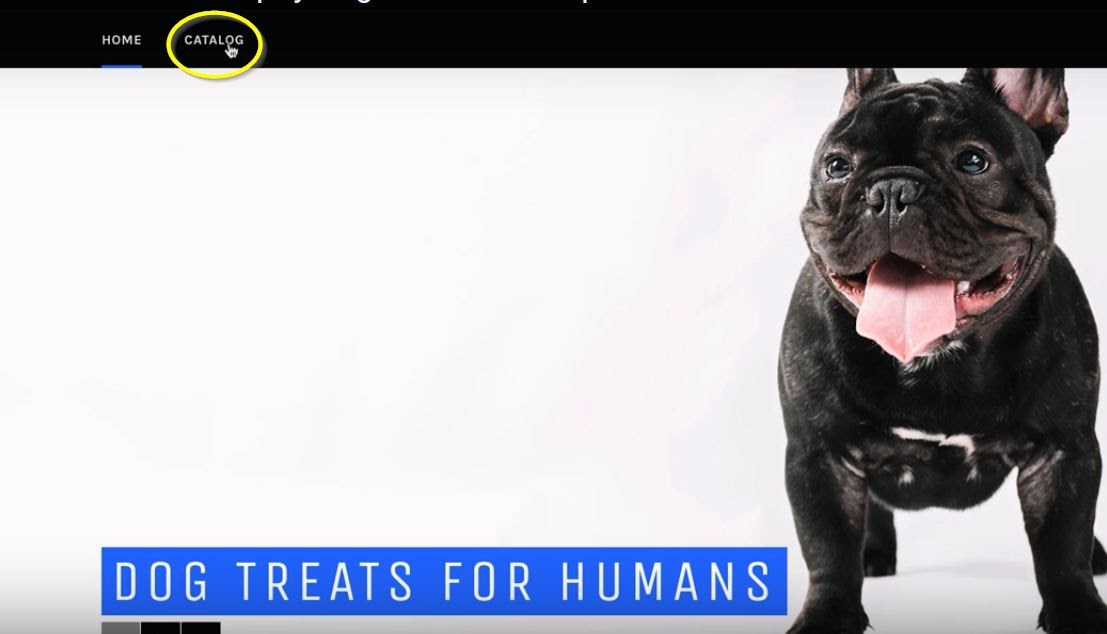
Now, this is very important. In order for this discount to work, the customer has to put those specific products in their cart. We will show you how that works.
First, you will want to go to your store. You will click on catalog or menu or products, whatever label you have made for your store.
You will then find product X, the product that the customer has to buy in order to get product Y, the free item. Once you find that product, add it to your cart. Then find product Y, the free product, and add it to your cart.

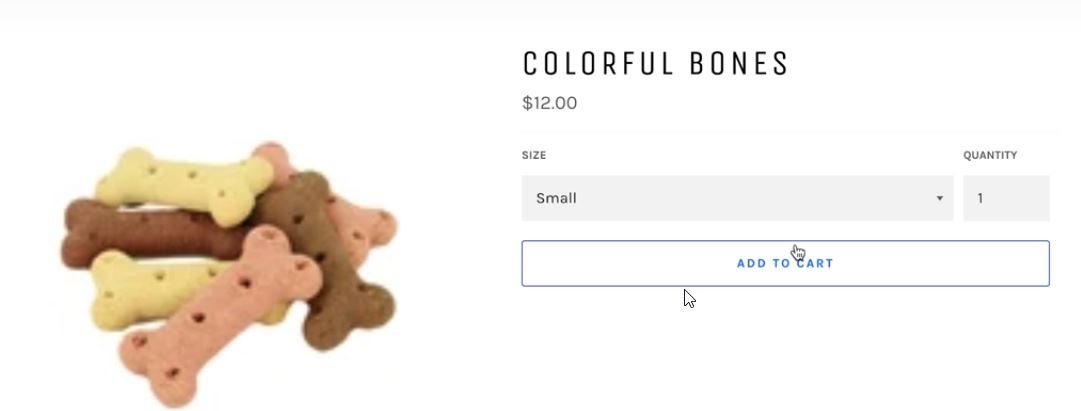
When you go to your cart, you should then see that Shopify has automatically taken off the cost of product Y because of that automatic discount you have set up. So, the only pricing that you should see would be for Product X.
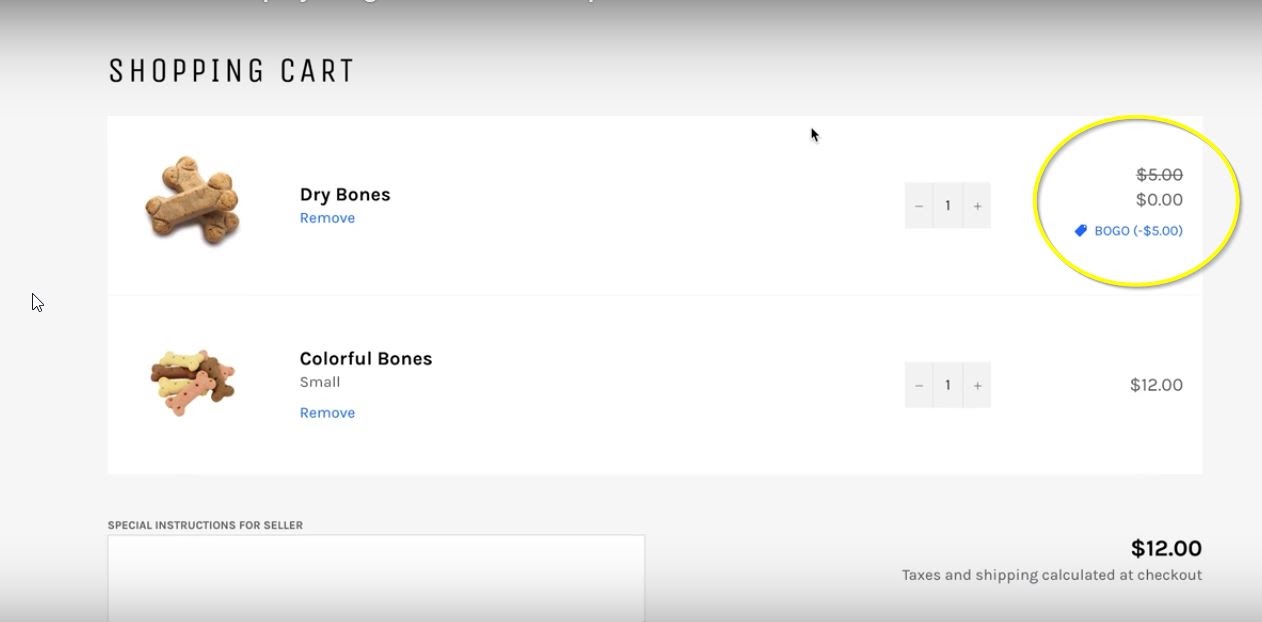
Now, if this wasn’t an automated discount, it would still have the same pricing and it wouldn’t say anything about BOGO. The customer would have to know that there is a BOGO2020 offer, and in the checkout page is where they would type in the discount code to get the discount.
Of course, there are pros and cons to using the manual and the automatic, so it really just depends on your store. Just remember that certain rules do apply like the fact that the customer needs to add both products in the cart for Shopify to include that automatic discount. Otherwise Shopify will not just add that free pair of socks discount even if you have product x in your cart. So make sure you pay attention to that.
That concludes our blog tutorial for BOGO discounts on Shopify. If you have any questions about this subject, please let us know in the comments so that we can try to help you out, or if you would like to see more tutorials on different kinds of discounts on Shopify, or anything else with Shopify. We are super responsive.
If you would like to watch our How To video on this subject, you can watch it here. Make sure to like the video as well as like and subscribe to our YouTube Channel and hit the bell so that you don't miss out on any of the content we put out every single week.
Are you interested in learning more about Shopify and how to use it in your business to generate more leads and sales on auto-pilot? Apply for our Leads Accelerator right here.

We'll take the time to understand your vision and goals, and work with you to develop a customized plan to help you succeed. Let's work together to bring your brand to life and drive success.


We believe every clothing brand deserves an online marketing strategy that works
Schedule Strategy Call